Costuming - Loki


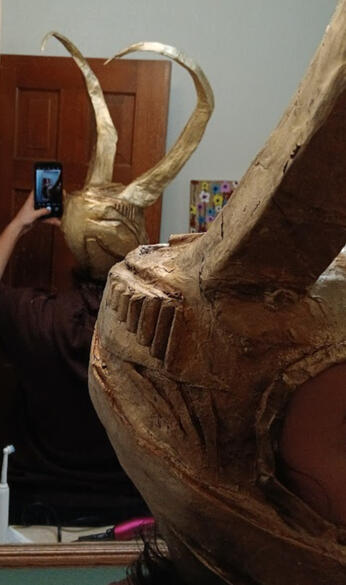
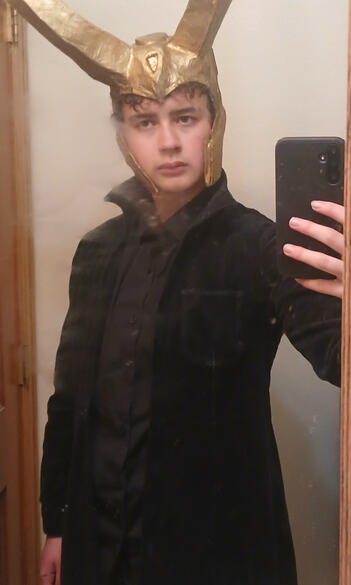
My Loki 2012 costume has been one of the most complex costumes I have created. It started with the helmet. To fit my head snugly I made a mold of my head by wrapping myself in plastic wrap and covering that in duct tape as my base. Once completed I built out the shape using cardboard and tape before I Paper-Mache over everything to give it stability and seal it together. After drying I used gold spray paint and to bring out the details I hand-painted with a dirty bronze
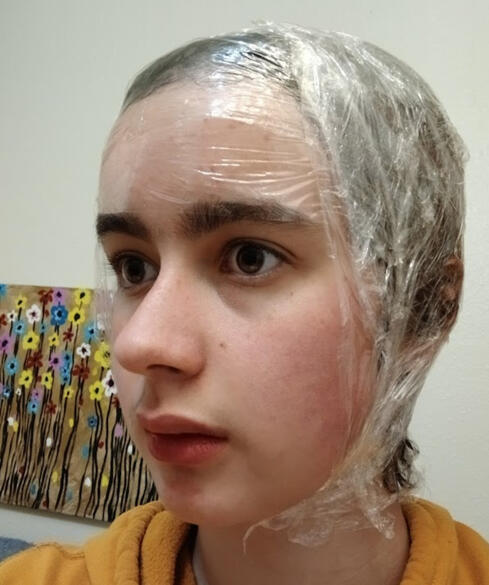
Me with plastic wrap over my head make the head mold
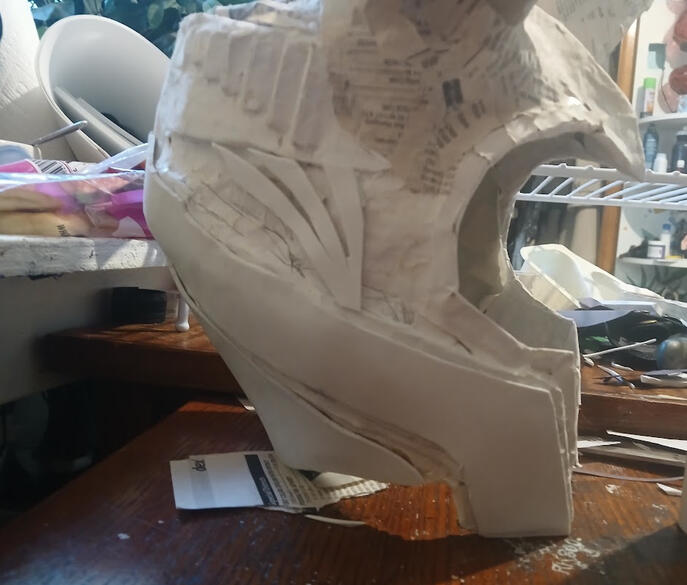
Unfinished Headpiece
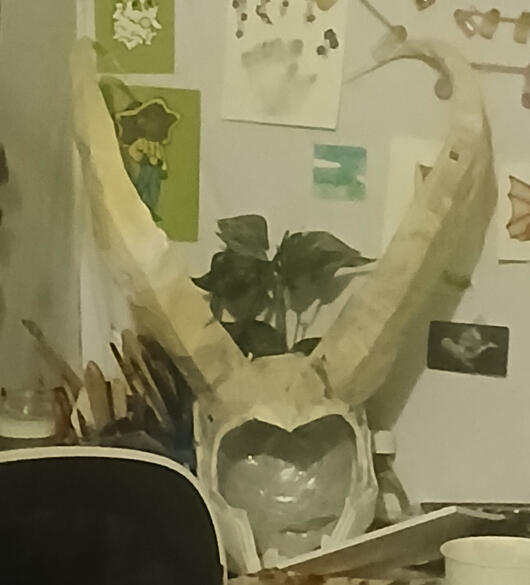
Unpainted Headpiece
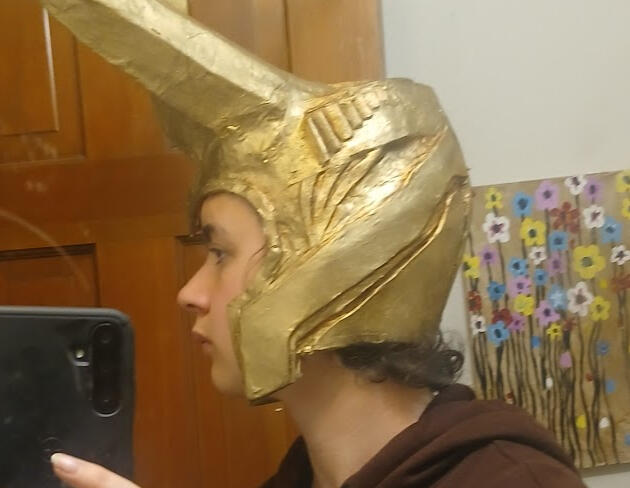
Finished Headpiece (1/3)
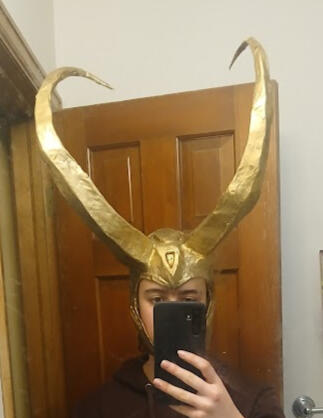
Finished Headpiece (2/3)
Finished Headpiece (3/3)


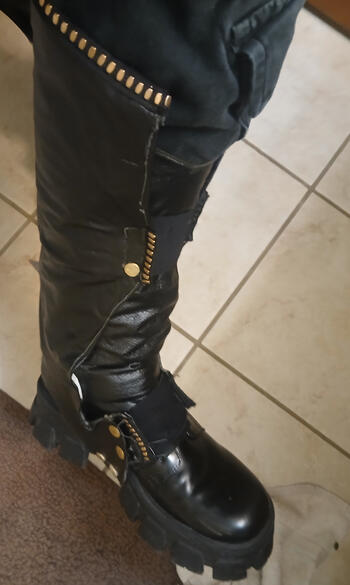
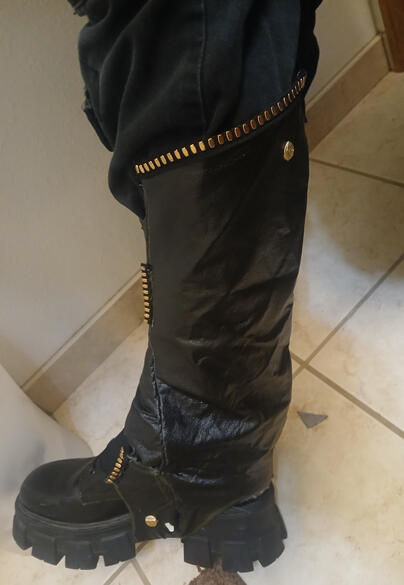
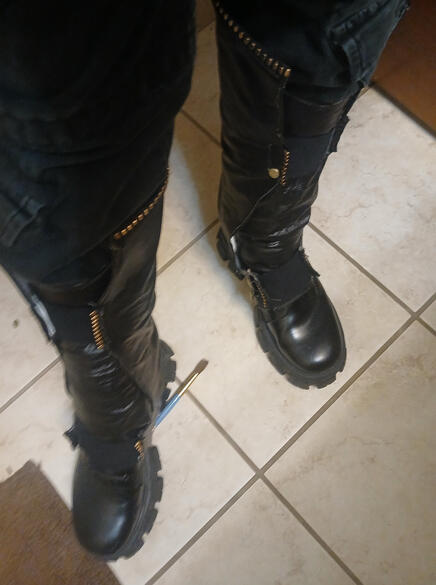
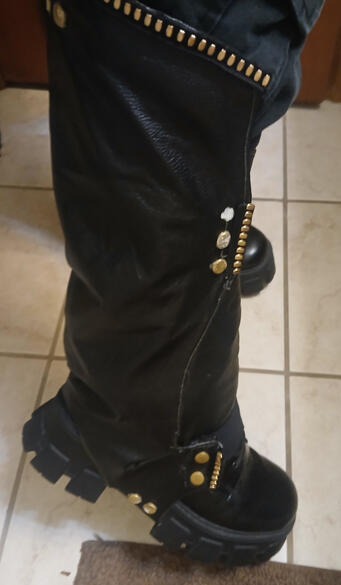
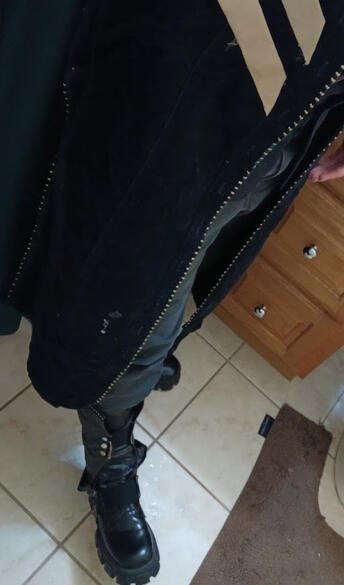
For the boots, I used some black platformers I already had. So I could wear them normally in the future, I took some similar black leather and cut a “wrap” that fits around my foot and calf to make what looks like a boot. I wanted to hide the lacing of the shoe so I put a “cover” over the lace held in place by elastic straps around the back. The outside has a cut-out for the heel of the shoe that is held in place by a strap over the top of the foot and 2 over the leg. The embellishments are made of clay and the rims were trim I found at Joanns.
Untitled
Untitled
Untitled
Untitled


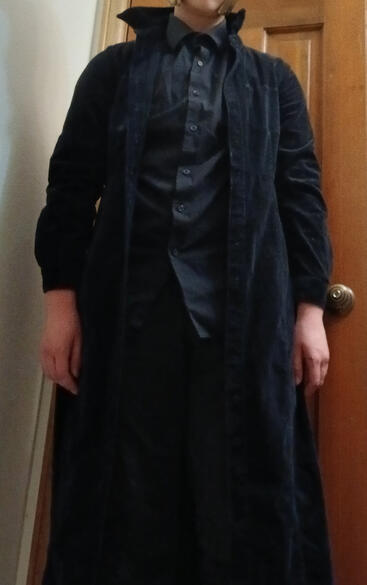
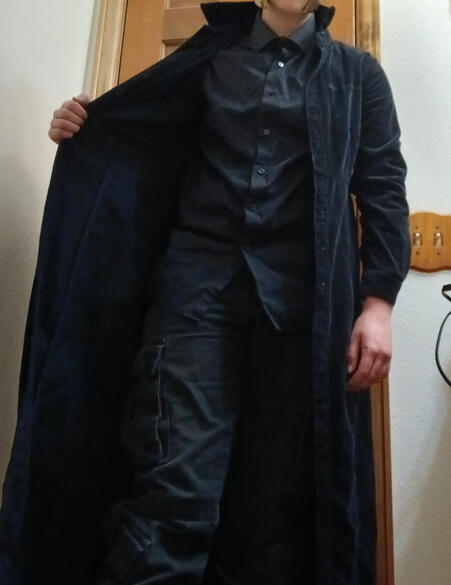
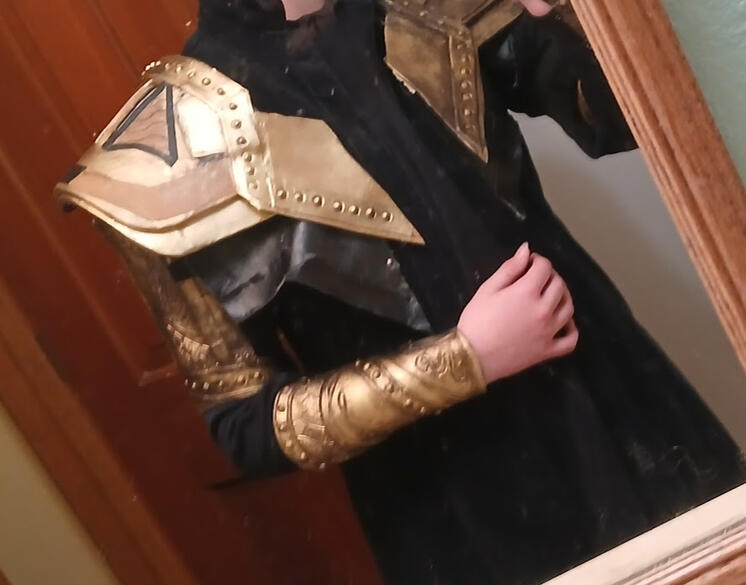
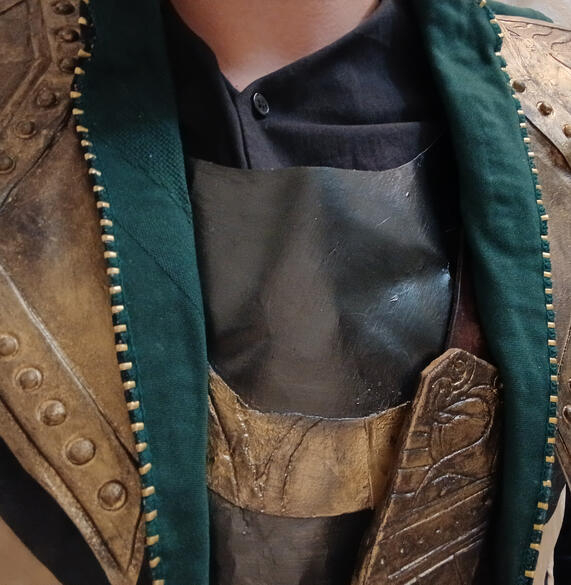
For the coat, I recycled an old medium blue trench coat and dyed it with jet-black Procion MX Fiber Reactive Dyes. I found this to be the worst part as dying clothes is much more of a science than I would have thought. After 2 rounds of dye, I cut the sleeves and fixed the collar upright. The padding for the shoulder plates was old leather from a tossed-out couch, painted black, pressed with texture, and lined with the spare leather I used for my boots. I wanted the padding since in the movies, Loki is sometimes seen without armor, which would allow my costume to still be accurate if removed.Once sewn onto the coat, using the scraps of my cape to line the insides, I then crimped the whole thing with 500 gauge #8 golden zipper top stoppers. This gives that little blingy gold edging you see. The last thing I did was glue some golden fabric to cardstock before attaching it to the coat to give it those ridged lines.
Un-Embellished Coat (1/3)
Un-Embellished Coat (2/3)
Un-Embellished Coat (3/3)
Coat with Shoulder Plate Padding
Coat with embellishments, ribs, and lining (1/2)
Coat with embellishments, ribs, and lining (2/2)


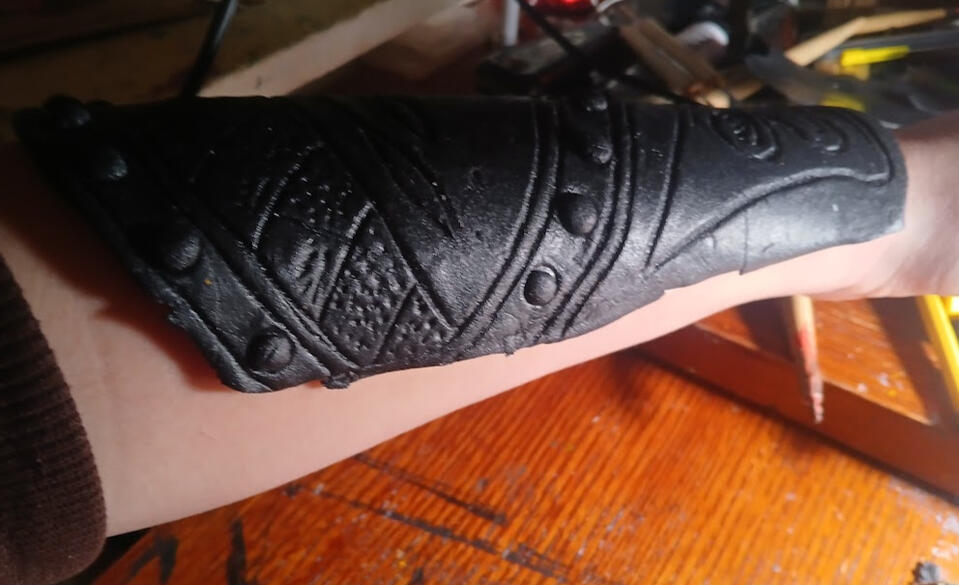
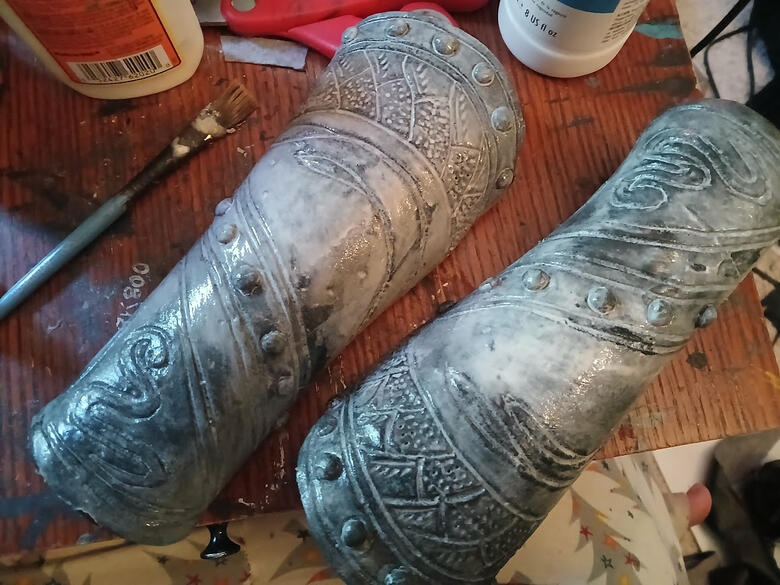
The armor was the part I think I had the most fun on. Everything is made with Worbla, a nontoxic plastic that can be melted and reheated with a heat gun. I liked how easy I found it to be to carve into, and with the right prepping how shiny it can be after. For the forearms, I cut the shape out with fun/craft foam and melted the plastic on top. The foam helps give it shape and prevent it from cracking, and the plastic naturally sticks to it. I heated it with a heat gun and molded it to the shape of my arms (don’t worry, it's not as dangerous as it sounds). I repeated this process for the upper arms and shoulder plates. I gave everything a few coats of wood glue (sealing in cracks and making it smoother like metal). Gave it a once over with gold spray paint and bronze to show the details. Using velcro strips on the inside of the shoulder plates and the outside of the coat, allows them to stay in place.
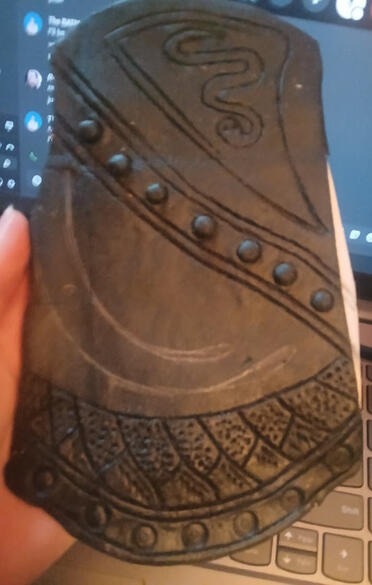
Flat Unmolded Forearm
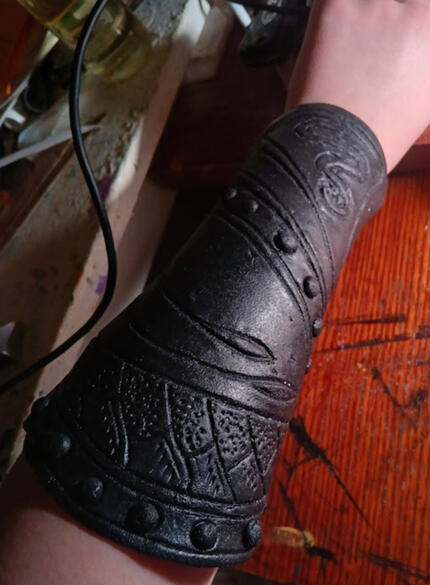
Armor when molded to my arm (1/2)
Armor molded to my arm (2/2)
Armor prepped with Wood glue
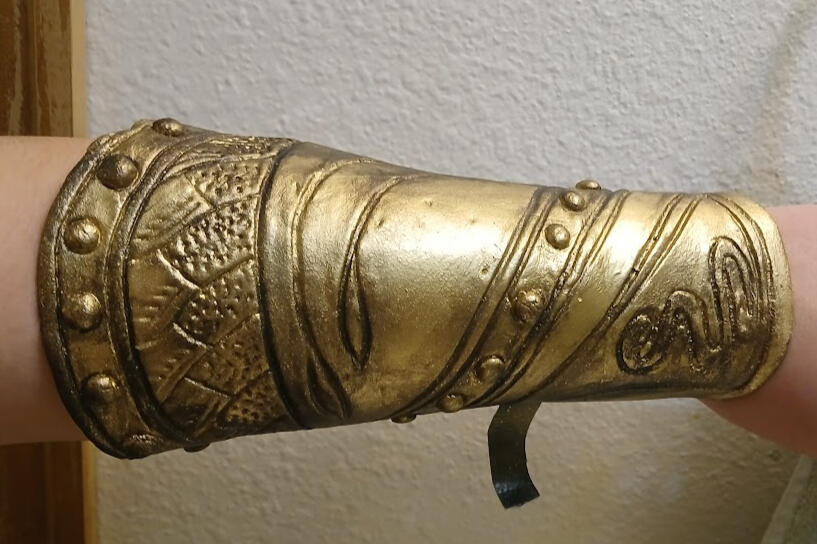
Finished for Forearm Armor
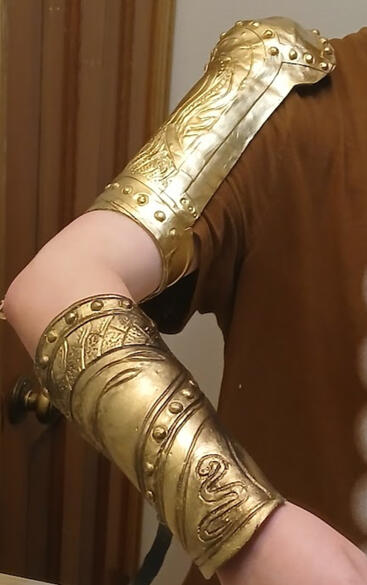
Finished Upper and Forearm Amour

(Left) unpainted Shoulder Plates


Last was a cape that I just recycled from an old green tablecloth. I cut it so it wouldn’t drag on the ground, then I just hemmed all the edges, ironed out so it folded over on the shoulder how I liked, and sewed the ends together. It attached to the armor with the same velcro technique as before